* Add Overview page

* Revert "Add Overview page"

* fix errors & formatting

* fix article usage according to the styles

* fix errors

* update according to PXT comments

* CVS-80775

* update support matrix with Python version

* fix formatting

* fix formatting

* CVS-71745

* update formatting

* fix formatting

* fix formatting

* fix links & errors

* fix formatting

* update bullet points

* update

* adjust the order

* update

* update

* updates

* update references

* update

* update

* apply same updates with 22/1

* minor fix

* update reference link

* fix CVS-71846

* test

* add troubleshooting steps

* restructure get started home page

* update navigation menu

* update formatting

* fix mistakes

* update wording

* update

* rename configurations files

* update wording

* adjust the structure

* update formatting

* reverse the heading

* test with formatting

* 2nd version of Get Started homepage

* add line breaks

* change to ordered list

* update wording

* update content

* updates

* update DL workbench reference

* update wording

* update references to pip installations

* remove redundant files

* update headings

* update

* update

* restructure

* rename

* updates

* remove a comment

* correct grammar

* correct grammar

* update structure

* update headings

* restructure

* fix formatting

* change the capitalization

* update heading

* update PyPI install

* updates

* update formatting

* Update docs/install_guides/troubleshooting-steps.md

Co-authored-by: Helena Kloosterman <helena.kloosterman@intel.com>

* Update docs/install_guides/troubleshooting-steps.md

Co-authored-by: Helena Kloosterman <helena.kloosterman@intel.com>

* integrating comments

* update

* update

* correct an error

* correct an error

* update

* update

* update wording

* typo

* typo

* hiding CentOS issues

* update headings

* update heading

* Update docs/get_started/get_started_demos.md

Co-authored-by: Karol Blaszczak <karol.blaszczak@intel.com>

* Update docs/get_started/get_started_demos.md

Co-authored-by: Karol Blaszczak <karol.blaszczak@intel.com>

* Update docs/install_guides/installing-model-dev-tools.md

Co-authored-by: Karol Blaszczak <karol.blaszczak@intel.com>

* Update docs/install_guides/installing-model-dev-tools.md

Co-authored-by: Karol Blaszczak <karol.blaszczak@intel.com>

* Update docs/install_guides/pypi-openvino-dev.md

* Update docs/install_guides/pypi-openvino-dev.md

Co-authored-by: Karol Blaszczak <karol.blaszczak@intel.com>

Co-authored-by: Helena Kloosterman <helena.kloosterman@intel.com>
Co-authored-by: Karol Blaszczak <karol.blaszczak@intel.com>
15 KiB
Basic OpenVINO™ Workflow
This guide will walk you through a basic workflow for Intel® Distribution of OpenVINO™ toolkit, including how to use code samples.
This guide assumes you have completed all the installation and preparation steps. If you have not, check out the Prerequisites section to install OpenVINO Runtime, install OpenVINO Development Tools, or build samples and demos.
After that, you will perform the following steps:
- Use Model Downloader to download a suitable model.
- Convert the model with Model Optimizer.
- Download media files to run inference.
- Run inference on a sample and see the results. The following code sample is used as an example:
Prerequisites
Install OpenVINO Runtime
If you have not yet installed and configured the toolkit, see the following guides:
@sphinxdirective .. tab:: Linux
See :doc:Install Intel® Distribution of OpenVINO™ toolkit for Linux <openvino_docs_install_guides_installing_openvino_linux>
.. tab:: Windows
See :doc:Install Intel® Distribution of OpenVINO™ toolkit for Windows <openvino_docs_install_guides_installing_openvino_windows>
.. tab:: macOS
See :doc:Install Intel® Distribution of OpenVINO™ toolkit for macOS <openvino_docs_install_guides_installing_openvino_macos>
@endsphinxdirective
Install OpenVINO Development Tools
To install OpenVINO Development Tools for working with Caffe models, use the following command:
pip install openvino-dev[caffe]
For more detailed steps, see Install OpenVINO™ Development Tools
Build Samples and Demos
If you have already built the demos and samples, you can skip this section. The build will take about 5-10 minutes, depending on your system.
To build OpenVINO samples:
@sphinxdirective .. tab:: Linux
Go to :doc:OpenVINO Samples page <openvino_docs_OV_UG_Samples_Overview> and see the "Build the Sample Applications on Linux" section.
.. tab:: Windows
Go to :doc:OpenVINO Samples page <openvino_docs_OV_UG_Samples_Overview> and see the "Build the Sample Applications on Microsoft Windows OS" section.
.. tab:: macOS
Go to :doc:OpenVINO Samples page <openvino_docs_OV_UG_Samples_Overview> and see the "Build the Sample Applications on macOS" section.
@endsphinxdirective
To build OpenVINO demos:
@sphinxdirective
.. tab:: Linux
Go to :doc:Open Model Zoo Demos page <omz_demos> and see the "Build the Demo Applications on Linux" section.
.. tab:: Windows
Go to :doc:Open Model Zoo Demos page <omz_demos> and see the "Build the Demo Applications on Microsoft Windows OS" section.
.. tab:: macOS
Go to :doc:Open Model Zoo Demos page <omz_demos> and see the "Build the Demo Applications on Linux*" section. You can use the requirements from "To build OpenVINO samples" above and adapt the Linux build steps for macOS.
@endsphinxdirective
Step 1: Download the Models
You must have a model that is specific for your inference task. Example model types are:
- Classification (AlexNet, GoogleNet, SqueezeNet, others): Detects one type of element in an image
- Object Detection (SSD, YOLO): Draws bounding boxes around multiple types of objects in an image
- Custom: Often based on SSD
Options to find a model suitable for the OpenVINO™ toolkit:
- Download public or Intel pre-trained models from the Open Model Zoo using the [Model Downloader tool](@ref omz_tools_downloader)
- Download from GitHub*, Caffe* Zoo, TensorFlow* Zoo, etc.
- Train your own model with machine learning tools
This guide uses the OpenVINO™ Model Downloader to get pre-trained models. You can use one of the following commands to find a model:
- List the models available in the downloader
omz_info_dumper --print_all
- Use
grepto list models that have a specific name pattern
omz_info_dumper --print_all | grep <model_name>
- Use Model Downloader to download models.
This guide uses <models_dir> and <models_name> as placeholders for the models directory and model name:
omz_downloader --name <model_name> --output_dir <models_dir>
- Download the following models to run the Image Classification Sample:
| Model Name | Code Sample or Demo App |
|---|---|
googlenet-v1 |
Image Classification Sample |
@sphinxdirective .. raw:: html
@endsphinxdirective
To download the GoogleNet v1 Caffe model to the models folder:
@sphinxdirective
.. tab:: Linux
.. code-block:: sh
omz_downloader --name googlenet-v1 --output_dir ~/models
.. tab:: Windows
.. code-block:: bat
omz_downloader --name googlenet-v1 --output_dir %USERPROFILE%\Documents\models
.. tab:: macOS
.. code-block:: sh
omz_downloader --name googlenet-v1 --output_dir ~/models
@endsphinxdirective
Your screen looks similar to this after the download and shows the paths of downloaded files:
@sphinxdirective .. tab:: Linux
.. code-block:: sh
  ###############|| Downloading models ||###############

  ========= Downloading /home/username/models/public/googlenet-v1/googlenet-v1.prototxt

  ========= Downloading /home/username/models/public/googlenet-v1/googlenet-v1.caffemodel
  ... 100%, 4834 KB, 3157 KB/s, 1 seconds passed

  ###############|| Post processing ||###############

  ========= Replacing text in /home/username/models/public/googlenet-v1/googlenet-v1.prototxt =========
.. tab:: Windows
.. code-block:: bat
  ################|| Downloading models ||################

  ========== Downloading C:\Users\username\Documents\models\public\googlenet-v1\googlenet-v1.prototxt
  ... 100%, 9 KB, ? KB/s, 0 seconds passed

  ========== Downloading C:\Users\username\Documents\models\public\googlenet-v1\googlenet-v1.caffemodel
  ... 100%, 4834 KB, 571 KB/s, 8 seconds passed

  ################|| Post-processing ||################

  ========== Replacing text in C:\Users\username\Documents\models\public\googlenet-v1\googlenet-v1.prototxt
.. tab:: macOS
.. code-block:: sh
  ###############|| Downloading models ||###############

  ========= Downloading /Users/username/models/public/googlenet-v1/googlenet-v1.prototxt
  ... 100%, 9 KB, 44058 KB/s, 0 seconds passed

  ========= Downloading /Users/username/models/public/googlenet-v1/googlenet-v1.caffemodel
  ... 100%, 4834 KB, 4877 KB/s, 0 seconds passed

  ###############|| Post processing ||###############

  ========= Replacing text in /Users/username/models/public/googlenet-v1/googlenet-v1.prototxt =========
@endsphinxdirective
@sphinxdirective .. raw:: html
@endsphinxdirective
Step 2: Convert the Model with Model Optimizer
In this step, your trained models are ready to run through the Model Optimizer to convert them to the IR (Intermediate Representation) format. For most model types, this is required before using the OpenVINO Runtime with the model.
Models in the IR format always include an .xml and .bin file and may also include other files such as .json or .mapping. Make sure you have these files together in a single directory so the OpenVINO Runtime can find them.
REQUIRED: model_name.xml
REQUIRED: model_name.bin
OPTIONAL: model_name.json, model_name.mapping, etc.
This tutorial uses the public GoogleNet v1 Caffe* model to run the Image Classification Sample. See the example in the Download Models section of this page to learn how to download this model.
The googlenet-v1 model is downloaded in the Caffe* format. You must use the Model Optimizer to convert the model to IR.
Create an <ir_dir> directory to contain the model's Intermediate Representation (IR).
@sphinxdirective
.. tab:: Linux
.. code-block:: sh
mkdir ~/ir
.. tab:: Windows
.. code-block:: bat
mkdir %USERPROFILE%\Documents\ir
.. tab:: macOS
.. code-block:: sh
mkdir ~/ir
@endsphinxdirective
The OpenVINO Runtime can infer models where floating-point weights are compressed to FP16. To generate an IR with a specific precision, run the Model Optimizer with the appropriate --data_type option.
Generic Model Optimizer script:
mo --input_model <model_dir>/<model_file> --data_type <model_precision> --output_dir <ir_dir>
IR files produced by the script are written to the <ir_dir> directory.
The command with most placeholders filled in and FP16 precision:
@sphinxdirective
.. tab:: Linux
.. code-block:: sh
mo --input_model ~/models/public/googlenet-v1/googlenet-v1.caffemodel --data_type FP16 --output_dir ~/ir
.. tab:: Windows
.. code-block:: bat
mo --input_model %USERPROFILE%\Documents\models\public\googlenet-v1\googlenet-v1.caffemodel --data_type FP16 --output_dir %USERPROFILE%\Documents\ir
.. tab:: macOS
.. code-block:: sh
mo --input_model ~/models/public/googlenet-v1/googlenet-v1.caffemodel --data_type FP16 --output_dir ~/ir
@endsphinxdirective
Step 3: Download a Video or a Photo as Media
Many sources are available from which you can download video media to use the code samples and demo applications. Possibilities include:
As an alternative, the Intel® Distribution of OpenVINO™ toolkit includes several sample images and videos that you can use for running code samples and demo applications:
Step 4: Run Inference on a Sample
Run the Image Classification Code Sample
To run the Image Classification code sample with an input image using the IR model:
-
Set up the OpenVINO environment variables: @sphinxdirective .. tab:: Linux
.. code-block:: sh
source <INSTALL_DIR>/setupvars.sh
.. tab:: Windows
.. code-block:: bat
<INSTALL_DIR>\setupvars.bat
.. tab:: macOS
.. code-block:: sh
source <INSTALL_DIR>/setupvars.sh
@endsphinxdirective
-
Go to the code samples release directory created when you built the samples earlier: @sphinxdirective .. tab:: Linux
.. code-block:: sh
cd ~/inference_engine_cpp_samples_build/intel64/Release
.. tab:: Windows
.. code-block:: bat
cd %USERPROFILE%\Documents\Intel\OpenVINO\inference_engine_samples_build\intel64\Release
.. tab:: macOS
.. code-block:: sh
cd ~/inference_engine_cpp_samples_build/intel64/Release
@endsphinxdirective
- Run the code sample executable, specifying the input media file, the IR for your model, and a target device for performing inference:
@sphinxdirective .. tab:: Linux
.. code-block:: sh
classification_sample_async -i <path_to_media> -m <path_to_model> -d <target_device>
.. tab:: Windows
.. code-block:: bat
classification_sample_async.exe -i <path_to_media> -m <path_to_model> -d <target_device>
.. tab:: macOS
.. code-block:: sh
classification_sample_async -i <path_to_media> -m <path_to_model> -d <target_device>
@endsphinxdirective
@sphinxdirective .. raw:: html
@endsphinxdirective
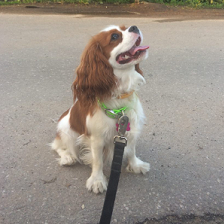
The following commands run the Image Classification Code Sample using the dog.bmp file as an input image, the model in IR format from the ir directory, and on different hardware devices:
CPU:
@sphinxdirective
.. tab:: Linux
.. code-block:: sh
./classification_sample_async -i ~/Downloads/dog.bmp -m ~/ir/googlenet-v1.xml -d CPU
.. tab:: Windows
.. code-block:: bat
.\classification_sample_async.exe -i %USERPROFILE%\Downloads\dog.bmp -m %USERPROFILE%\Documents\ir\googlenet-v1.xml -d CPU
.. tab:: macOS
.. code-block:: sh
./classification_sample_async -i ~/Downloads/dog.bmp -m ~/ir/googlenet-v1.xml -d CPU
@endsphinxdirective
GPU:
Note
: Running inference on Intel® Processor Graphics (GPU) requires additional hardware configuration steps, as described earlier on this page. Running on GPU is not compatible with macOS*.
@sphinxdirective .. tab:: Linux
.. code-block:: sh
./classification_sample_async -i ~/Downloads/dog.bmp -m ~/ir/googlenet-v1.xml -d GPU
.. tab:: Windows
.. code-block:: bat
.\classification_sample_async.exe -i %USERPROFILE%\Downloads\dog.bmp -m %USERPROFILE%\Documents\ir\googlenet-v1.xml -d GPU
@endsphinxdirective
MYRIAD:
Note
: Running inference on VPU devices (Intel® Movidius™ Neural Compute Stick or Intel® Neural Compute Stick 2) with the MYRIAD plugin requires additional hardware configuration steps, as described earlier on this page.
@sphinxdirective .. tab:: Linux
.. code-block:: sh
./classification_sample_async -i ~/Downloads/dog.bmp -m ~/ir/googlenet-v1.xml -d MYRIAD
.. tab:: Windows
.. code-block:: bat
.\classification_sample_async.exe -i %USERPROFILE%\Downloads\dog.bmp -m %USERPROFILE%\Documents\ir\googlenet-v1.xml -d MYRIAD
.. tab:: macOS
.. code-block:: sh
./classification_sample_async -i ~/Downloads/dog.bmp -m ~/ir/googlenet-v1.xml -d MYRIAD
@endsphinxdirective
When the sample application is complete, you see the label and confidence for the top 10 categories on the display. Below is a sample output with inference results on CPU:
@sphinxdirective
.. code-block:: sh
Top 10 results:
Image dog.bmp
  classid probability label
  ------- ----------- -----
  156     0.6875963   Blenheim spaniel
  215     0.0868125   Brittany spaniel
  218     0.0784114   Welsh springer spaniel
  212     0.0597296   English setter
  217     0.0212105   English springer, English springer spaniel
  219     0.0194193   cocker spaniel, English cocker spaniel, cocker
  247     0.0086272   Saint Bernard, St Bernard
  157     0.0058511   papillon
  216     0.0057589   clumber, clumber spaniel
  154     0.0052615   Pekinese, Pekingese, Peke
@endsphinxdirective
@sphinxdirective .. raw:: html
@endsphinxdirective
Other Demos/Samples
For more samples and demos, you can visit the samples and demos pages below. You can review samples and demos by complexity or by usage, run the relevant application, and adapt the code for your use.
[Demos](@ref omz_demos)